五 数据库存储爬取的信息(MySQL)
爬取到的数据为了更好地进行分析利用,而之前将爬取得数据存放在txt文件中后期处理起来会比较麻烦,很不方便,如果数据量比较大的情况下,查找更加麻烦,所以我们通常会把爬取的数据存储到数据库中便于后期分析利用。
这里,数据库选择MySQL,采用pymysql这个第三方库来处理python和mysql数据库的存取,python连接mysql数据库的配置信息
db_config ={
    'host': '127.0.0.1',
    'port': 3306,
    'user': 'root',
    'password': '',
    'db': 'pytest',
    'charset': 'utf8'
}
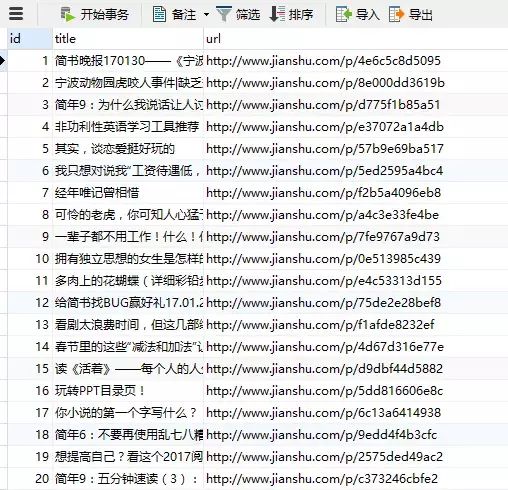
以爬取简书首页文章标题以及url为例,先分析抓取目标信息,

如上图,文章题目在a标签中,且url(href)只含有后半部分,所以在存储的时候,最好把它补全。
mysql:新建一个数据库pytest,建立一张名为titles的表,表中字段分别为id(int自增),title(varchar),url(varchar),如下:

进行数据库操作的思路为:获得数据库连接(connection)->获得游标(cursor)->执行sql语句(execute)->事物提交(commit)->关闭数据据库连接(close),具体代码实现如下:
# -*- coding:utf-8 -*-
from urllib import
request
from bs4 import BeautifulSoup
import pymysql
# mysql连接信息(字典形式)
db_config ={
'host': '127.0.0.1',
'port': 3306,
'user': 'root',
'password': '',
'db': 'pytest',
'charset': 'utf8'
}
# 获得数据库连接
connection = pymysql.connect(**db_config)
# 数据库配置,获得连接(参数方式)
# connection = pymysql.connect(host='127.0.0.1',
# port=3306,
# user='root',
# password='',
# db='pytest',
# charset='utf8')
url = r'http://www.jianshu.com/'
# 模拟浏览器头
headers = {
'User-Agent':'Mozilla/5.0 (Windows NT 10.0; WOW64) AppleWebKit/537.36 (KHTML, like Gecko) Chrome/55.0.2883.87 Safari/537.36'
}
page = request.Request(url, headers=headers)
page_info = request.urlopen(page).read().decode('utf-8')
soup = BeautifulSoup(page_info, 'html.parser')
urls = soup.find_all('a', 'title')
try:
# 获得数据库游标
with connection.cursor() as cursor:
sql = 'insert into titles(title, url) values(%s, %s)'
for u in urls:
# 执行sql语句
cursor.execute(sql, (u.string, r'http://www.jianshu.com'+u.attrs['href']))
# 事务提交
connection.commit()
finally:
# 关闭数据库连接
connection.close()
代码执行结果:
六、Scrapy初体验
之前大概学习了下通过urllib和Beautiful Soup 进行简单数据爬取的流程,但是那只适用于一些简单的、数据量比较小的爬虫项目,如果需要爬取的数据量比较大的话,之前的方法必定非常缓慢,所以就有了Scrapy,Scrapy是一个快速的web抓取框架,可抓取web站点并从页面中提取结构化的数据。Scrapy给我们提供了许多的爬虫基类,我们可以直接继承使用,当然,既然Scrapy是一个框架,我们也可以根据自己的需要对它进行修改,下面我们就慢慢来看Scrapy的使用。
(一)安装(Windows)
Scrapy是纯Python编写的,所以需要一些比较重要的的Python依赖包:
lxml, an efficient XML and HTML parser
parsel, an HTML/XML data extraction library written on top of lxml,
w3lib, a multi-purpose helper for dealing with URLs and web page encodings
twisted, an asynchronous networking framework
cryptography and pyOpenSSL, to deal with various network-level security needs
看着依赖包比较多,其实安装起来并不复杂,以管理员的身份运行Windows命令提示符,在以安装Python的前提下,运行:
pip install scrapy
pip会自动下载相关依赖包,如果顺利的话,会直接安装完成。
要注意的是,确认一下python的版本,pip会根据系统自动安装相关包,即如果系统是64位的,pip就会安装64位的包,但是twisted的版本一定要和python的一样,如果操作系统是64位的,python是32位的,pip直接安装的twisted安装就会出错。
如果pip安装twisted时出错,在命令行输入python,查看本地python版本,然后到这里下载和python版本相同的whl文件,使用pip install xxx.whl安装,完成后再执行一遍pip install scrapy即可。
在命令行输入scrapy, 若不报错,则安装完成。
(二) 第一个Scrapy项目
照例,先上官方文档 1.3,找了一下网上翻译的文档都是0.24或者0.24版,所以建议大家还是看官方最新的英文版比较好。
打开命令提示符,进入想要创建项目的目录,运行
scrapy startproject scrapyTest
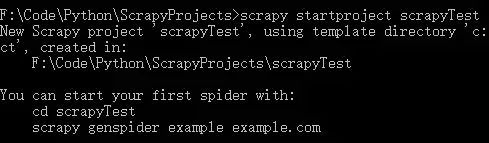
项目创建完成,让我们来看一下项目结构,执行:
tree /f
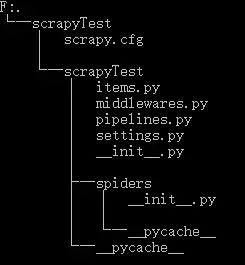
└─scrapyTest
    │  scrapy.cfg           # 配置文件(deploy configuration file)
    │
    └─scrapyTest
        │  items.py         # 项目中的item文件(project items definition file)
        │  middlewares.py   # 中间件
        │  pipelines.py     # 项目中的管道文件(project pipelines file)
        │  settings.py      # 项目中的设置文件(project settings file)
        │  __init__.py
        │
        ├─spiders           # 存放爬虫的文件夹(a directory where you'll later put your spiders)
        │  │  __init__.py
        │  │
        │  └─__pycache__
        └─__pycache__
进入spiders目录,新建test_spider.py如下:
# -*- coding:utf-8 -*-
import scrapy
from bs4 import BeautifulSoup
class tsSpride(scrapy.Spider):
name = 'test' # 爬虫的唯一名字,在项目中爬虫名字一定不能重复
# start_requests() 必须返回一个迭代的Request
def start_requests(self):
# 待爬取的URL列表
urls = ['http://www.jianshu.com/',]
# 模拟浏览器
headers = {'User-Agent': 'Mozilla/5.0 (Windows NT 10.0; WOW64) AppleWebKit/537.36 (KHTML, like Gecko) Chrome/55.0.2883.87 Safari/537.36'}
for url in urls:
yield scrapy.Request(url=url, headers=headers, callback=self.parse)
# 处理每个请求的下载响应
def parse(self, response):
soup = BeautifulSoup(response.body, 'html.parser')
titles = soup.find_all('a', 'title')
for title in titles:
print(title.string)
在命令行输入
scrapy crawl test
结果如下:
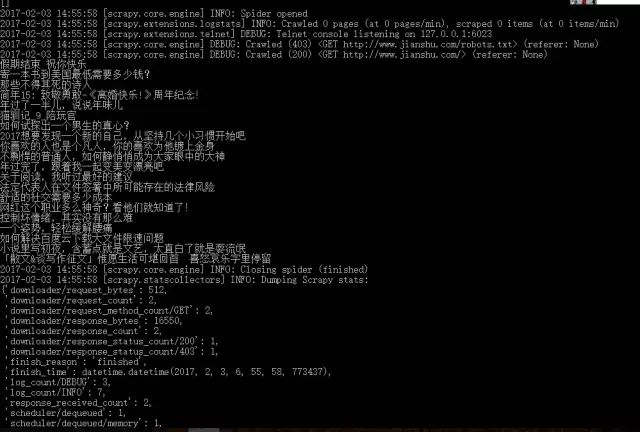
上述代码Scrapy为start_requests 中的每个URL创建了scrapy.Request对象,并将 parse() 方法作为回调函数(callback)赋值给了Request(Scray中parse()为默认回调方法)。
七 Scrapy小例子
之前我们知道了Scrapy中每个文件所代表的含义,这次我们就以爬取拉勾网Python相关招聘信息来具体演示下Scrapy每个文件的用法。
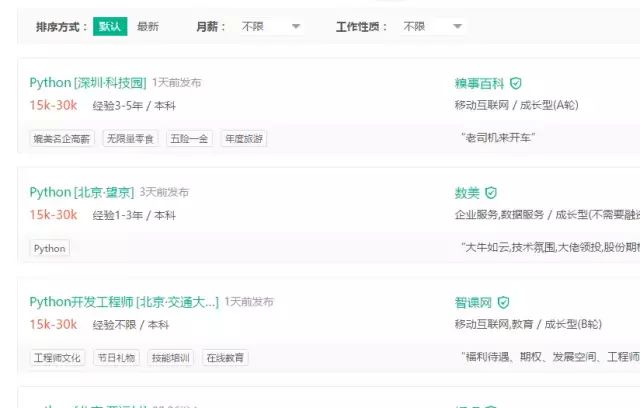
我们要做的是,将拉勾网以‘Python’为关键字搜索到的招聘信息前五页爬下来,然后将其中的‘职位’、‘薪资’、‘学历要求’、‘工作地点’、‘公司名称’以及‘信息发布时间’提取出来并存储到MySQL数据库中。
(一)准备工作
我们先到拉勾网,在技术一栏中点击Python,得到如下页面:
点击下一页,观察地址栏URL的变化:
第二页的URL
https://www.lagou.com/zhaopin/Python/2/?filterOption=2
我们可以发现,页码的变化体现在URL中的两个数字上,由此,我们便可以得到我们需要爬取的5个页面的URL分别为:
urls = ['https://www.lagou.com/zhaopin/Python/1/?filterOption=1',
                'https://www.lagou.com/zhaopin/Python/2/?filterOption=2',
                'https://www.lagou.com/zhaopin/Python/3/?filterOption=3',
                'https://www.lagou.com/zhaopin/Python/4/?filterOption=4',
                'https://www.lagou.com/zhaopin/Python/5/?filterOption=5',
                ]
整理好需要爬取的URL后,我们来按F12打开开发者工具,找我们需要提取的信息:
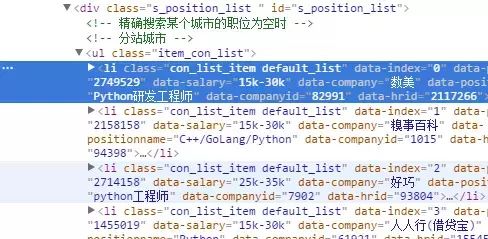
可以看到需要爬取的信息都在
标签中没,右键复制一个li标签,整理一下格式,得到如下代码:
class="con_list_item default_list" data-index="3" data-positionid="991482" data-salary="8k-16k" data-company="昆明俊云科技有限公司" data-positionname="Python开发工程师" data-companyid="67804" data-hrid="1346958">
<div class="list_item_top">
<div class="position">
<div class="p_top">
<a class="position_link" href="//www.lagou.com/jobs/991482.html" target="_blank" data-index="3" data-lg-tj-id="8E00" data-lg-tj-no="0104" data-lg-tj-cid="991482" data-lg-tj-abt="dm-csearch-useSalarySorter|1">
<h2 style="max-width: 180px;">Python开发工程师h2>
<span class="add">[<em>昆明·盘龙区em>]span>
<span class="format-time">1天前发布span>
div>
<div class="p_bot">
<div class="li_b_l">
<span class="money">8k-16kspan>
经验1-3年 / 本科
div>
div>
div>
<div class="company">
<div class="company_name">
<a href="//www.lagou.com/gongsi/67804.html" target="_blank" data-lg-tj-id="8F00" data-lg-tj-no="0104" data-lg-tj-cid="67804" data-lg-tj-abt="dm-csearch-useSalarySorter|1">昆明俊云科技有限公司a><i class="company_mark"><span>该企业已上传营业执照并通过资质验证审核span>i>
div>
<div class="industry">
移动互联网,硬件 / 初创型(不需要融资)
div>
div>
<div class="com_logo">
<a href="//www.lagou.com/gongsi/67804.html" target="_blank" data-lg-tj-id="8G00" data-lg-tj-no="0104" data-lg-tj-cid="67804" data-lg-tj-abt="dm-csearch-useSalarySorter|1">a>
div>
div>
<div class="list_item_bot">
<div class="li_b_l">
<div class="li_b_r">
“福利优厚、期权奖励、五险一金、工作餐”
div>
div>
li>
可以发现,标签属性中有我们需要的’职位‘、’薪资‘、’公司名称‘,而’工作地点‘、’学历要求‘和’信息发布时间‘则在下面的各个标签中,于是我们可以使用如下代码,提取各个信息(Beautiful Soup):
info = BeautifulSoup(response.body, 'html.parser').find('li','con_list_item default_list')
 info.attrs['data-positionname'],  # 职位
info.attrs['data-salary']
 info.find('em').get_text().split('·')[0],  # 工作地点
 (info.find('span', 'format-time')).string,  # 发布时间
 info.find('div', 'li_b_l').get_text().split('/')[-1],  # 学历要求
 info.attrs['data-company'],  # 公司名称
(二)数据库的创建
先来建好数据库,这里使用的是MySQL数据库,建立如下:
DROP TABLE IF EXISTS `info01`;
CREATE TABLE `info01` (
`id` int(11) NOT NULL AUTO_INCREMENT,
`title` varchar(255) NOT NULL,
`salary` int(255) NOT NULL,
`position` varchar(255) NOT NULL,
`time` varchar(255) NOT NULL,
`grade` varchar(255) NOT NULL,
`company` varchar(255) NOT
NULL,
PRIMARY KEY (`id`)
) ENGINE=InnoDB AUTO_INCREMENT=498 DEFAULT CHARSET=utf8;
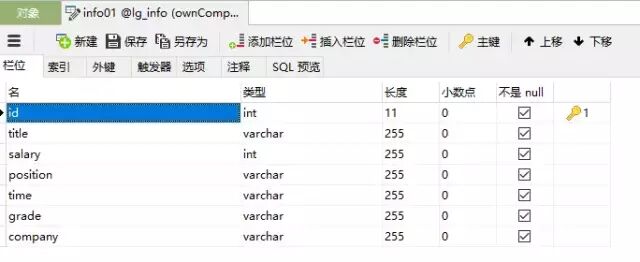
要注意的是,其中的id属性设为自增,’salary‘属性设为int类型,方便以后进行数据分析统计。
(三)代码编写
准备工作完成了,下面开始代码部分,先到工作目录中建立工程,在命令行中:
scrapy startproject lgSpider
先编辑items.py文件,该文件是一个简单的数据收集容器,用于保存爬虫爬取的数据,类似一个字典:
# items.py
# -*- coding: utf-8 -*-
import scrapy
class LgspiderItem(scrapy.Item):
# define the fields for your item here like:
# name = scrapy.Field()
title = scrapy.Field() # 职位
position = scrapy.Field() # 工作地点
salary = scrapy.Field() # 最低薪资
company = scrapy.Field() # 公司名称
time = scrapy.Field() # 信息发布时间
grade = scrapy.Field() # 学历要求
在spiders中建立爬虫文件lg_spider.py如下:
# -*- coding:utf-8 -*-
import scrapy
from bs4 import BeautifulSoup
class lg_spider(scrapy.Spider):
name = 'lg' # 爬虫名字
def start_requests(self):
# 待爬取的url地址
urls = ['https://www.lagou.com/zhaopin/Python/1/?filterOption=1',
'https://www.lagou.com/zhaopin/Python/2/?filterOption=2',
'https://www.lagou.com/zhaopin/Python/3/?filterOption=3',
'https://www.lagou.com/zhaopin/Python/4/?filterOption=4',
'https://www.lagou.com/zhaopin/Python/5/?filterOption=5',
]
# 模拟浏览器的头信息
headers = {
'User-Agent': 'Mozilla/5.0 (Windows NT 10.0; WOW64) AppleWebKit/537.36 (KHTML, like Gecko) Chrome/55.0.2883.87 Safari/537.36'}
for url in urls:
yield scrapy.Request(url=url, headers=headers, callback=self.parse)
def parse(self, response):
# 使用Beautiful Soup进行分析提取
soup = BeautifulSoup(response.body, 'html.parser')
for info in soup.find_all('li', 'con_list_item default_list'):
# 将提取的salary字符串,只截取最少工资并转换成整数形式,如:7k-12k -> 7000
salary = info.attrs['data-salary'].split('k')[0]
salary = int(salary) * 1000
# 存储爬取的信息
yield {
'title': info.attrs['data-positionname'], # 职位
'position': info.find('em').get_text().split('·')[0], # 工作地点
'salary': salary, # 最低工资
'time': (info.find('span', 'format-time')).string, # 发布时间
'grade': info.find('div', 'li_b_l').get_text().split('/')[-1], # 学历要求
'company'
: info.attrs['data-company'], # 公司名称
}
爬取的item被收集起来后,会被传送到pipelines中,进行一些处理,下面开始编辑pipelines.py用于将爬取的数据存入MySQL数据库,
# -*- coding: utf-8 -*-
import pymysql
# 数据库配置信息
db_config = {
'host': '127.0.0.1',
'port': 3306,
'user': 'root',
'password': '',
'db': 'lg_info',
'charset': 'utf8'
}
class LgspiderPipeline(object):
# 获取数据库连接和游标
def __init__(self):
self.connection = connection = pymysql.connect(**db_config)
self.cursor = self.connection.cursor()
# Pipeline必须实现的方法,对收集好的item进行一系列处理
def process_item(self, item, spider):
# 存储的SQL语句
sql = 'insert into info01(title, salary, position, time, grade, company) values(%s, %s, %s, %s, %s, %s)'
try:
self.cursor.execute(sql, (item['title'].encode('utf-8'),
item['salary'],
item['position'].encode('utf-8'),
item['time'].encode('utf-8'),
item['grade'].encode('utf-8'),
item['company'].encode('utf-8'),
)
)
self.connection.commit()
except pymysql.Error as e:
# 若存在异常则抛出
print(e.args)
return item
最后,再来配置settings.py文件,打开settings.py文件,会发现其中有很多注释,我们找到
# Configure item pipelines
它代表使用使用指定的pipeline,将其修改为如下格式:
# LgspiderPipeline即我们写的pipelines.py中的LgspiderPipeline类ITEM_PIPELINES = { 'lgSpider.pipelines.LgspiderPipeline': 300,
}
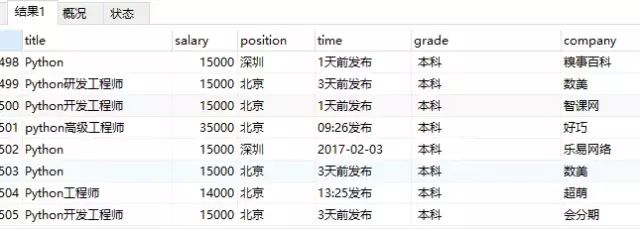
OK。所有工作都完成了,我们来执行一下爬虫看一下效果;
刷新一下数据库:

现在我们就可以通过sql语言,进行简单的数据统计,如找出所有最低工资高于10000的招聘信息:
select * FROM info01 WHERE salary>10000